Lith Corporation, founded in 1998 by a group of material science doctor from Tsinghua University, has now become the leading manufacturer of battery lab&production equipment. Lith Corporation have production factories in shenzhen and xiamen of China.This allows for the possibility of providing high quality and low-cost precision machines for lab&production equipment,including: roller press, film coater,mixer, high-temperature furnace, glove box,and complete set of equipment for research of rechargeable battery materials. Simple to operate, low cost and commitment to our customers is our priority.
DIY Glove Box: A Comprehensive Guide
Creating your own DIY glove box can be a costeffective and practical solution for applications that require a controlled environment, such as handling sensitive materials, conducting experiments, or working with hazardous substances. Below is a stepbystep guide to building a basic glove box, along with tips, considerations, and safety precautions.
●1. Purpose of a DIY Glove Box
A DIY glove box allows you to work with materials in an enclosed space while minimizing exposure to external contaminants (e.g., air, moisture, dust) or hazardous substances. It is particularly useful for:
Handling chemicals or powders.
Working with biological samples.
Conducting smallscale experiments.
Protecting sensitive electronics or materials.
●2. Materials Needed
A. Enclosure
Container: A transparent, airtight container such as:
Large plastic storage bin with a tightfitting lid.
Acrylic or PVC box.
Glass aquarium with a customsealed lid.
Sealant: Silicone sealant or hot glue for sealing gaps.
B. Gloves
Butyl Rubber Gloves: Ideal for chemical resistance.
Neoprene or Nitrile Gloves: For generalpurpose use.
C. Ports
PVC Pipe or Fittings: To create holes for the gloves.
Plastic Caps or Flanges: To secure the gloves in place.
D. Air Purge System
Vacuum Pump: Optional, for creating a vacuum or purging air.
Inert Gas Source: Nitrogen or argon tank (optional).
Tubing and Valves: For connecting gas lines.
E. Tools
Drill or hole saw.
Scissors or utility knife.
Sealant applicator.
Marker or pen.
●3. StepbyStep Instructions
Step 1: Choose the Container
Select a container that is large enough for your intended tasks.
Ensure it has a secure lid to maintain an airtight seal.
Step 2: Plan the Glove Ports
Decide where to place the glove ports. Typically:
Two ports on the front or sides for hands.
One port on the back or top for ventilation or gas purge.
Step 3: Cut the Glove Ports
Use a drill or hole saw to cut holes for the glove ports.
The holes should match the diameter of the PVC pipe or fittings.
Step 4: Install the Glove Ports
Insert PVC pipe or flanges into the holes.
Secure them with silicone sealant or hot glue to prevent leaks.
Step 5: Attach the Gloves
Cut the fingers off the gloves, leaving only the cuffs.
Slide the cuffs over the PVC pipes or flanges.
Secure the gloves with hose clamps or additional sealant.
Step 6: Add Ventilation (Optional)
If using a vacuum pump or inert gas source:
Drill a hole for tubing connections.
Attach valves and tubing to control airflow.
Step 7: Seal the Box
Inspect the container for gaps or leaks.
Apply silicone sealant around the lid, ports, and any other openings.
Step 8: Test the Glove Box
Perform a simple test by filling the box with smoke or fine powder.
Check for leaks and adjust seals as needed.
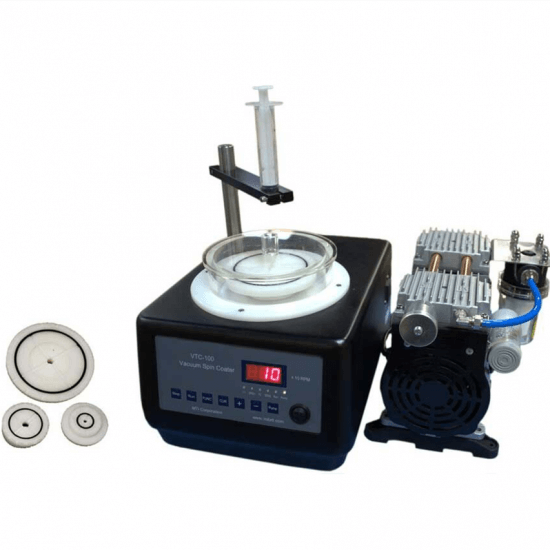
Spin Coater
●4. Enhancements for Advanced Functionality
A. Airlock Chamber
Create a separate compartment for transferring materials in and out of the box.
Use a second container or partitioned section with its own sealable door.
B. Gas Purge System
Connect a nitrogen or argon tank to purge the box of oxygen and moisture.
Use a regulator and flow meter to control gas flow.
C. Monitoring Systems
Install sensors to measure oxygen, moisture, or pressure levels.
Use digital displays or alarms for realtime feedback.
●5. Safety Considerations
1. Material Compatibility:
Ensure the container and gloves are compatible with the substances being handled.
2. Sealing Integrity:
Regularly inspect and maintain seals to prevent leaks.
3. Ventilation:
If working with hazardous materials, ensure proper ventilation outside the box.
4. Glove Durability:
Replace gloves if they show signs of wear or damage.
5. Pressure Control:
Avoid excessive vacuum or pressure that could compromise the box's integrity.
●6. Cost Comparison
| Component | DIY Cost | Commercial Cost |
||||
| Enclosure | $10–$50 | $500–$1,000+ |
| Gloves | $5–$20 | Included |
| Seals & Tools | $5–$20 | Included |
| Total | $20–$90 | $1,000–$5,000+ |
While a DIY glove box may not match the precision of commercial models, it offers significant cost savings for basic applications.
●7. Applications for DIY Glove Boxes
A. Hobby Projects
Electronics assembly.
3D printing with sensitive materials.
B. Educational Use
Chemistry experiments.
Biology projects involving microorganisms.
C. SmallScale Manufacturing
Handling airsensitive chemicals.
Coating or treating materials in a controlled environment.
●8. Troubleshooting Common Issues
| Problem | Solution |
|||
| Leaks | Reapply sealant or replace damaged components.|
| Poor Glove Fit | Adjust the size of the glove ports or use different gloves. |
| Difficulty Operating | Practice manipulating tools through the gloves. |
| Inadequate Purging | Increase gas flow rate or check for leaks. |
●9. Tips for Success
1. Plan Ahead:
Sketch your design before starting construction.
2. Use Quality Materials:
Invest in durable gloves and a sturdy container.
3. Test Thoroughly:
Ensure all seals are airtight before use.
4. Expand Gradually:
Start with a basic setup and add features like an airlock or gas purge system later.
●10. Conclusion
Building a DIY glove box is a rewarding project that can save time and money while providing a functional controlled environment for various applications. With careful planning, quality materials, and attention to detail, you can create a reliable glove box tailored to your specific needs.
If you have further questions about designing or improving your DIY glove box, feel free to ask!
 English ▼
 Subscribe to us
 ONLINE
 +86 13174506016
 Louis@lithmachine.com
 +86 18559646958
 18659217588


